Pick a device
WURMagotchi runs on two boards. Both play the same game and meet, gift, and fight each other (and Wurm Beacons) over Bluetooth. Install either from the Flasher.
The original. A Cheap Yellow Display with a 2.8" resistive touch screen, landscape, with an action bar along the bottom. Saves to a microSD card. Easiest to get going: a bare board on USB power is a complete pet.
The Waveshare ESP32-S3-Touch-AMOLED-1.64, a 1.64" AMOLED touch board. Portrait and swipe-driven, small enough for a watch case. Saves to its own flash, no SD card.
These are reference links, not affiliate links. Buy from wherever is convenient.
CYD shopping list
| Part | Needed for |
|---|---|
| Cheap Yellow Display (ESP32-2432S028R) | Required. The device itself, runs the firmware. Everything below is optional. |
| microSD card | Saves your Würm, settings, and achievements across reboots. Without one, nothing persists. |
| 1W 8Ω mini speaker | Audio output for beeps and jingles. |
| Slide switch | A physical power switch, since the board itself doesn't have one. |
For the original case:
| Part | Needed for |
|---|---|
| 3000mAh LiPo battery | Untethered power. Read out in the Husbandry Guide's Battery section. |
| M2 screws | Mounting hardware for the case. |
| M2 threaded inserts | Melt into the printed case so the M2 screws thread into plastic instead of stripping it. |
For the handheld case:
| Part | Needed for |
|---|---|
| 755060 LiPo, 3.7 V (about 2000–2500 mAh, 7.5 × 50 × 60 mm) with a 1.25 mm 2-pin plug | Untethered power. The bay is 8.1 × 51.2 × 61 mm. Check the plug's polarity against the board's BAT connector before plugging in. |
| Cavity speaker, 15 × 10 × 3.5 mm, with a 1.25 mm 2-pin plug | Audio. Sits in its own pocket over a grille in the back. |
| 4 × M3 × 20 mm button-head screws (ISO 7380) | Go in from the back, through the board's corner holes, and cut their own thread in the front posts. Self-tapping M3/#4 × 20 mm screws for plastic also work. |
| 3 mm clear acrylic (PMMA) rod, 35 mm long | Light pipe that carries the RGB status LED (on the back of the board, under the battery) to a window in the side. See Cases. |
Touch shopping list
| Part | Needed for |
|---|---|
| Waveshare ESP32-S3-Touch-AMOLED-1.64 | Required. The device itself. Get it with the header pins and M2 standoffs fitted (or fit them yourself); the watch case screws into the standoffs. |
| 402030 LiPo, 3.7 V, about 260 mAh (4 × 20 × 30 mm), with an MX1.25 2-pin plug | Untethered power. Buy one with a protection circuit, and check the plug's polarity against the board's battery connector before plugging in; small LiPo plugs aren't wired consistently between sellers. |
| 20 mm bare piezo disc with wire leads (e.g. Murata 7BB-20-6L0) | Optional sound. Solder its two wires to header P1 pins 8 and 9 (GPIO15 / GPIO16), either way round; it sits in a pocket under the battery. |
| 4 × M2 × 8 mm machine screws (button, pan or socket head, ≤4 mm across) | Hold the board in the watch case, threading into its standoffs. Use M2 × 12 mm with the deep case. |
| 22 mm watch band with quick-release spring bars | Quick-release bars make it a two-second job to free the strap over the USB-C port for charging. |
3D-printable cases
PLA or PETG, 0.2 mm layers, 3 walls, no supports. Print each part the way the STL loads.
CYD: original case
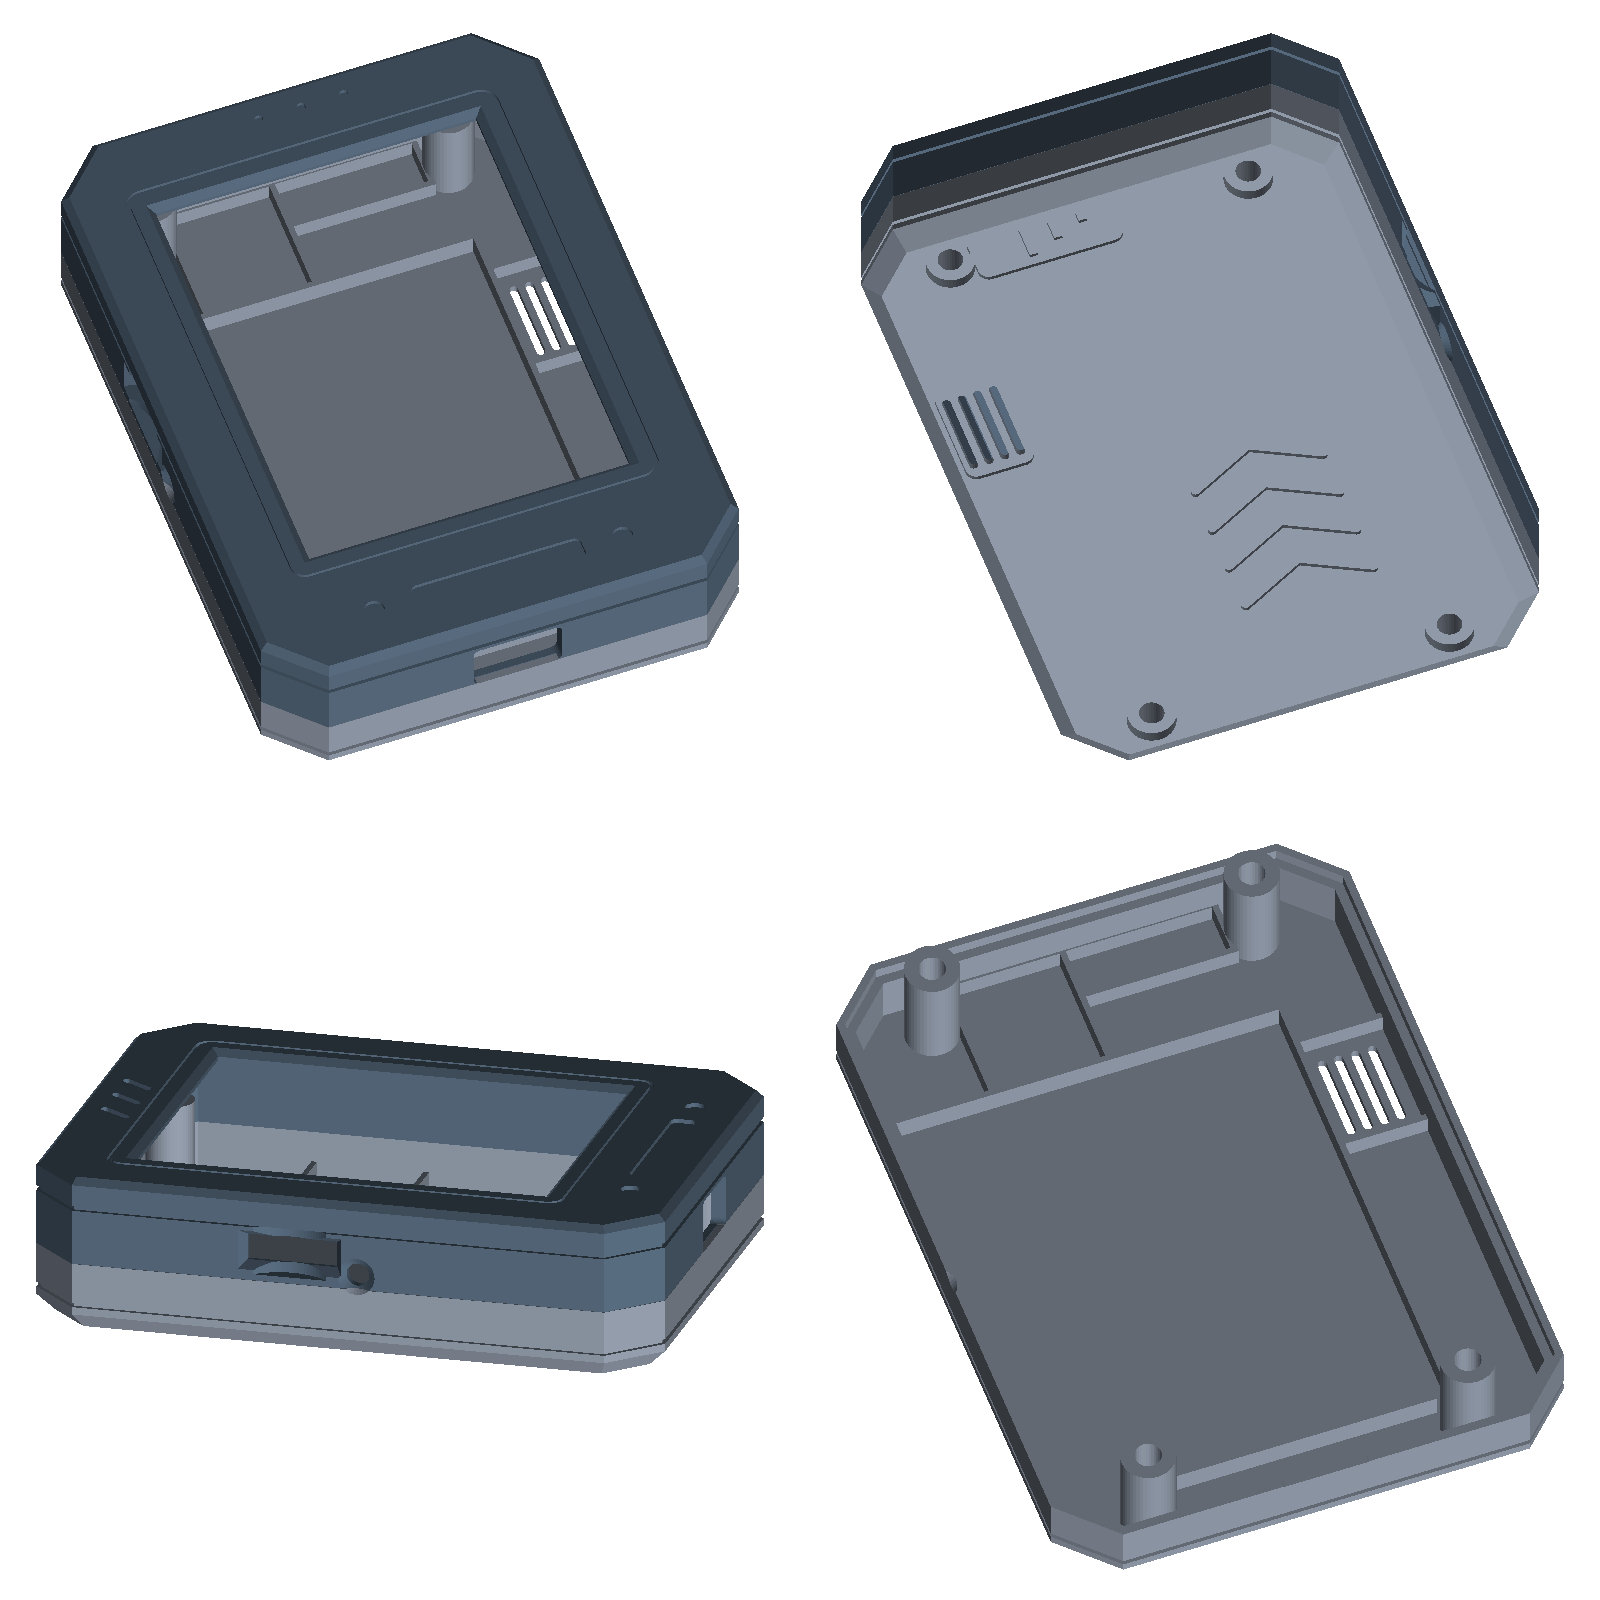
Two-part case, held together with M2 screws and threaded inserts. The back has a small hole over the RGB status LED, positioned for the near-centred LED placement most CYD boards use (see Which CYD?).
CYD: handheld case
An angular, armour-cornered handheld, 67.4 × 91.4 × 22.8 mm, for the 755060 battery and the cavity speaker. A bezel and a back shell, clamped by four M3 × 20 screws through the board's corner holes. Openings for USB-C and the microSD slot (with a thumb scoop), and a light-pipe window for the RGB LED. Made for the lcdwiki 2.8" ESP32-32E (E32R28T) board.
Touch: watch case
A back case that leaves the AMOLED face exposed, holds the 402030 battery (and optional piezo disc) underneath, and takes a standard 22 mm watch band. The side slots line up with the BOOT and RESET buttons; USB-C sits between the bottom lugs.
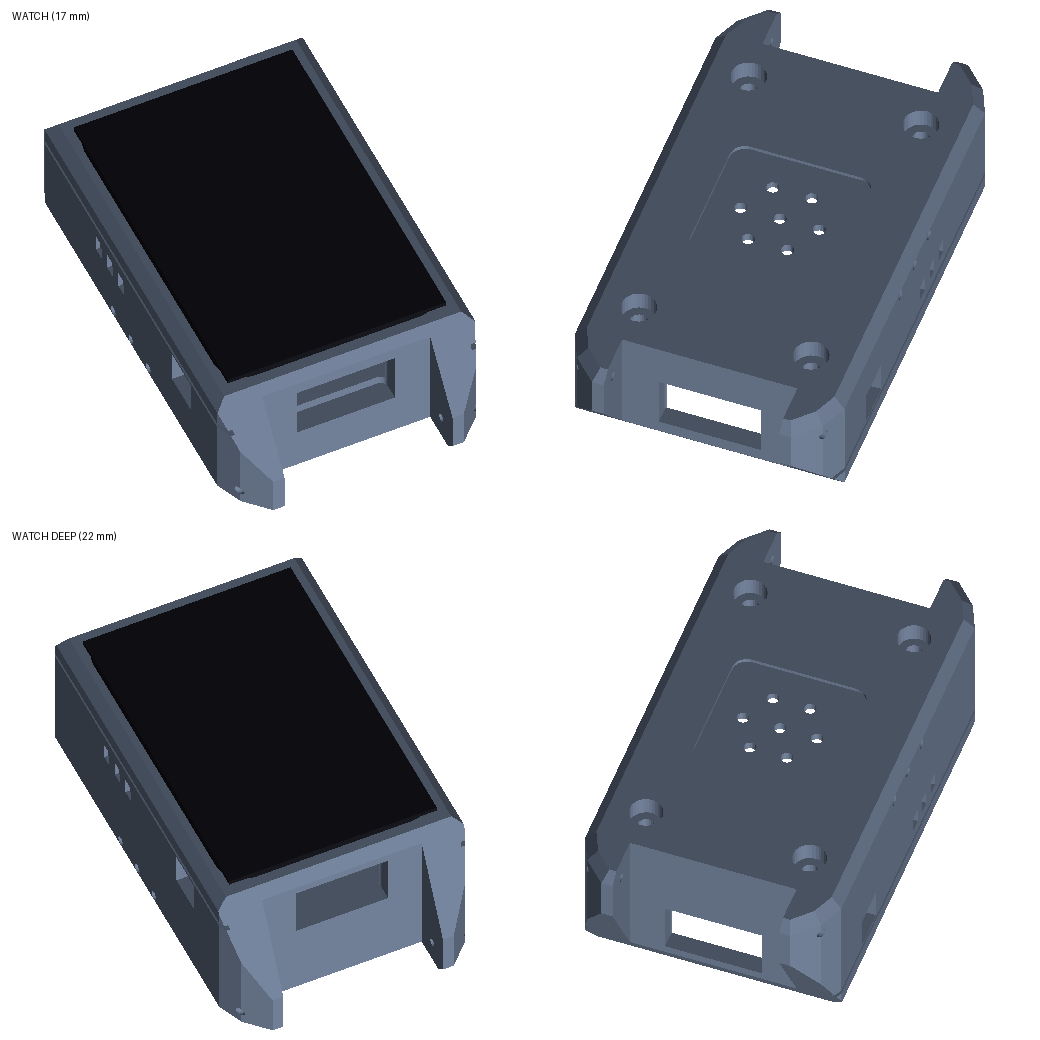
Trim the header pins to about 1 mm below their plastic strip first. M2 × 8 screws.
The spring-bar holes may print slightly small; open them up with a 1.2 mm drill bit by hand, or push a spare spring bar through.
Touch: pocket & keychain cases
Five sci-fi bodies around the same internals as the watch case, about 17 mm thick. They take the same battery, optional piezo disc and M2 × 8 screws, and need the header pins trimmed. Each has a wide keyring slot; USB-C comes out of the bottom end and BOOT / RESET are reached through small slots in the sides.
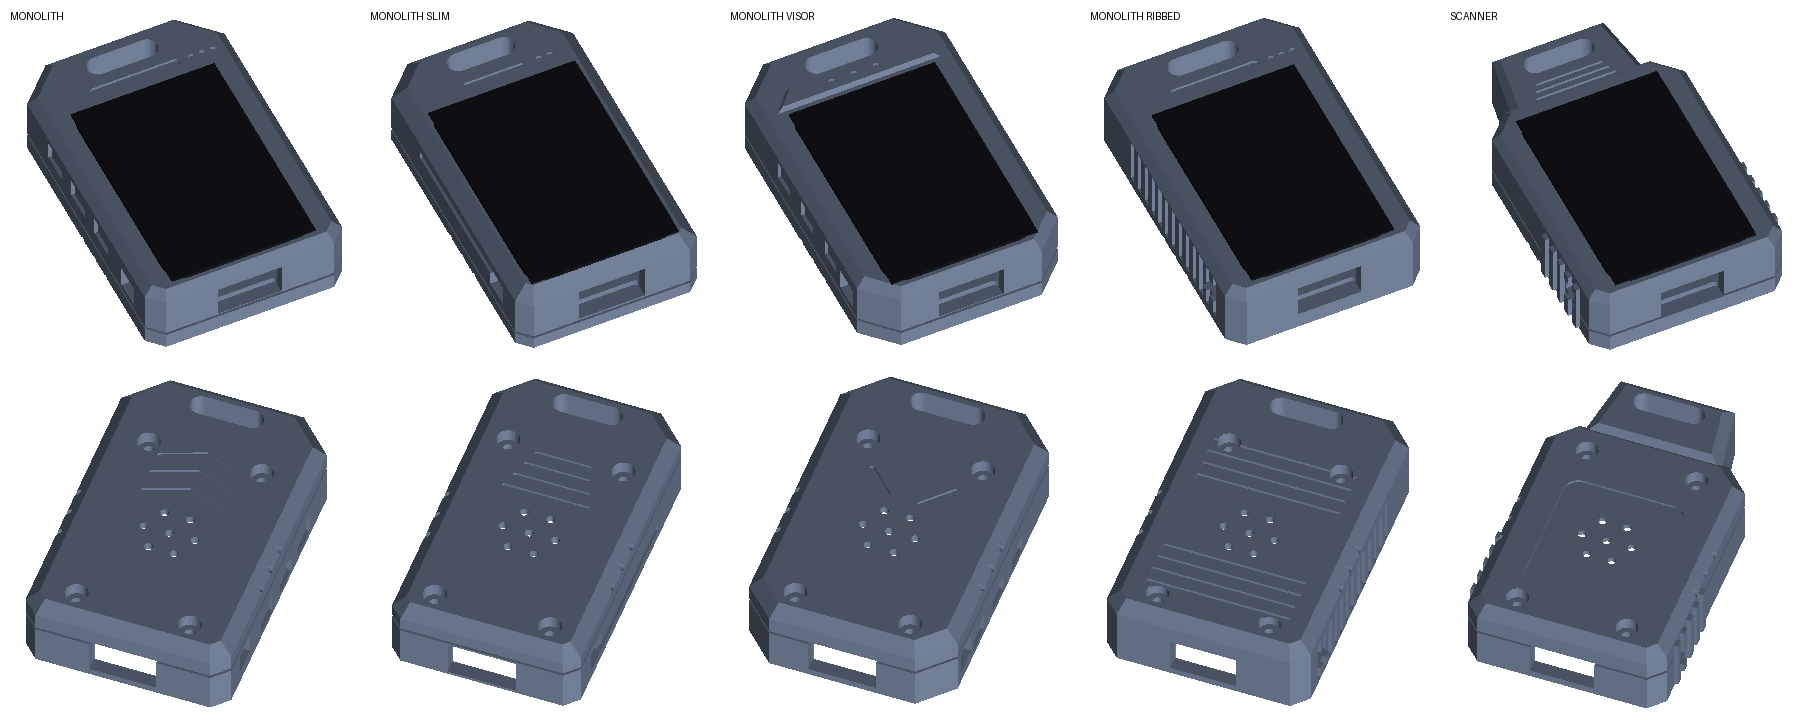
Bevelled slab with a wide keyring slot, a status bar and side rails.
Narrower, with bigger top facets and one long groove down each side.
A raised, angled visor with three lights across the top of the face.
Which CYD?
There are multiple models of Cheap Yellow Display, and they differ in ways that matter here.
Beyond that: WURMagotchi works best on the "Exposed SPI" version, but should work on other 2.8" variants too. A few other differences to watch for:
- Inverted displays. Some CYD units ship with an inverted panel. Settings has an INVERT toggle to correct this. If colors look like a photo negative on first boot, use it.
- No battery connector. Some models have no onboard battery connector and need a separate charging circuit instead, meaning extra cutting and soldering. This charging module works for that case.
- LED placement. Both printed cases expect the back-panel RGB status LED in the near-centred spot most CYD boards use. A board with the LED somewhere else won't line up with the case's hole or light pipe.
Formatting the SD card
Required on the CYD for anything to persist across reboots: your Würm, settings, Wi-Fi network, and achievements. The Touch build doesn't use one.
Format any microSD card as exFAT and insert it into the card slot before first boot. Capacity doesn't matter; the firmware only ever stores a handful of small data files.
Putting it together
CYD
- Flash the firmware to the CYD (see the Flasher) and confirm it boots and responds to touch before closing anything up.
- Format the microSD card to exFAT and insert it.
- Handheld case: fit the light pipe into the bezel; stick the speaker into its pocket in the back shell (sound opening down, over the grille) and lay the battery in its bay.
- Plug in the speaker and the battery (polarity!), if installed.
- Original case: install the board with the M2 screws into the melted-in threaded inserts. Handheld case: lay the board face-down in the bezel, close the back shell, and drive the four M3 × 20 screws in from the back. Snug, not tight.
Touch (watch or pocket case)
- Flash the firmware (see the Flasher) and confirm it boots.
- Trim the header pins (standard case), or use the deep case.
- Optional sound: lay the piezo disc in the round pocket at the bottom of the battery bay, brass side down, wires up the side grooves, with a thin piece of foam on top.
- Put the battery in the bay, wires toward the USB-C end, and plug it into the board (polarity!).
- Lower the board in screen-up, USB-C at the end with the rectangular opening, and drive the M2 screws up through the bottom into the standoffs.
- Watch case: fit the band's spring bars into the lug holes. Pocket cases: add a keyring.